Signals
Godot implements the observer pattern using signals.
A signal represents a callback that any Godot Object, including an Orchestration, can connect to and react when the signal is fired.
In addition, signals can provide contextual information using function arguments.
Creating signals
To create a new signal in an orchestration, follow these steps:
- Press the button on the Signal component view.

- Enter a unique name when the new signal entry is added. This is the name of the signal that parts of the orchestration as well as external Godot objects can connect and be notified when the signal is fired.
Renaming signals
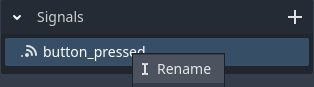
To rename a signal:
- Right-click the signal in the component panel, and select Rename in the context-menu.
- Enter the new signal name in the text box and press Enter.

Any node in the current orchestration that refers to the signal will automatically update when the signal is renamed. Any other external resource, including another Orchestration will not automatically update and will need to be changed after the signal is renamed.
Deleting a signal
To delete a signal:
- Select the Signal in the Component panel.
- Right-click and select Remove in the context-menu.
Removing a Signal will also remove all signal nodes that refer to that signal from the orchestration.
Passing data with signals
Signals can also pass additional data to their listeners (objects that are connected to the signal), much like how a caller passes arguments to a function call.
Each signal has a signature, much like a function, and when an Object connects to the signal, the function that is registered as the Callable for the signal must match the signal's argument signature.
For example, a CheckBox emits both a pressed and a toggled signal.
The pressed signal does not pass any arguments, and so the callable will simply have an empty argument list.
An orchestration function that listens to pressed signals would look like, taking note that there are no arguments:
void _on_pressed() {
}
The toggled signal is different, it passes the current toggled state of the CheckBox, notifying the listener of the current checked state of the CheckBox.
An orchestration function that listens to toggled signals would look like:
void _on_toggled(bool p_new_checkbox_state) {
}
When you define a signal in Orchestrator, you can add arguments to the signal's signature in the Inspector view:
- Select the Signal in the Component panel.
- Modify the
Argument Countproperty, which defaults to0for no arguments. - Expand each argument added,
Argument 1,Argument 2, and so on. - Modify the argument's
typeby selecting a type from the drop-down list. For example, to pass a 3D object's position, you would selectVector3, as positions in 3D space are represented by a Vector withx,y, andzcoordinates. - Customize the argument's
nameto better describe what the argument represents. For example, to pass a 3D object's position, you might set the name toposition.
Emit a signal
When a signal is emitted or fired, this notifies any connected observers that some condition has occurred.
The notification to all observer Callable functions happens within the main thread, synchronously.
How to emit a signal
To emit a signal within an Orchestration:
- Select the desired Signal from the Component view.
- Drag the Signal onto the graph.
- Releasing the mouse button will spawn an Emit Signal node.
- Connect the execution pin with other nodes so that the signal is fired when needed.
- If the Signal defines any arguments, connect any input arguments.
Emit signal properties
You can set all the properties for a signal in the Inspector panel.
| Property | Description |
|---|---|
| Argument Count | Specifies the number of arguments that the signal includes, defaults to 0. |
Argument n Type | Specifies the n-th argument's type. Only connections that match the type can be connected to the input pin. |
Argument n Name | Specifies the n-th argument's name, which can better describe what the argument represents. |
Each argument defined in the Inspector view will be represented as an input pin on the Emit Signal node in the graph.
Reducing the number of signal arguments will automatically disconnect any connections in the graph to that argument pin. In the event you accidentally reduce the number of arguments and break a connection, be sure to reconnect the pins after adjusting the argument count.
Await a signal
There are situations where you may need to make use of a coroutine, which allows the current execution of the code to temporarily yield until some condition is met before continuing the code continues where it left off. This technique is quite powerful as it simplifies the logic needed to yield and wait for that condition. In Godot, coroutines work in conjunction with signals.
How to await a signal
To asynchronously wait for a signal to be fired:
- Right-click the graph and search for
Await Signalin the All Actions dialog. - Select
Await Signaland press the Add button or simply press Enter. - Connect the execution pins with other nodes to that the await is called when needed.
- Connect to manually assign the name of the signal to the
Signal Nameinput pin. - Connect a reference to the object that emits the signal to the
Targetpin, which defaults to the current orchestration.
Await signal properties
There are no properties in the Inspector view that can be modified for the Await Signal node; however, there are two input pins that can be customized on the node in the graph.
| Input | Description |
|---|---|
| Target | Specifies the object that the orchestration should connect to and wait. |
| Signal Name | Specifies the name of the signal that the target that the orchestration will wait. |